Spring Fire Pit Revival: The Ultimate Glow-Up Guide
Every spring, something inside me stirs—and no, it’s not just my seasonal allergy kicking in like a marching band. It’s the annual itch to clean, to organize, to bring life back to the cozy corners I love. And sitting right at the top of that list? My fire pit.
Spring Fire Pit Revival: The Ultimate Glow-Up Guide
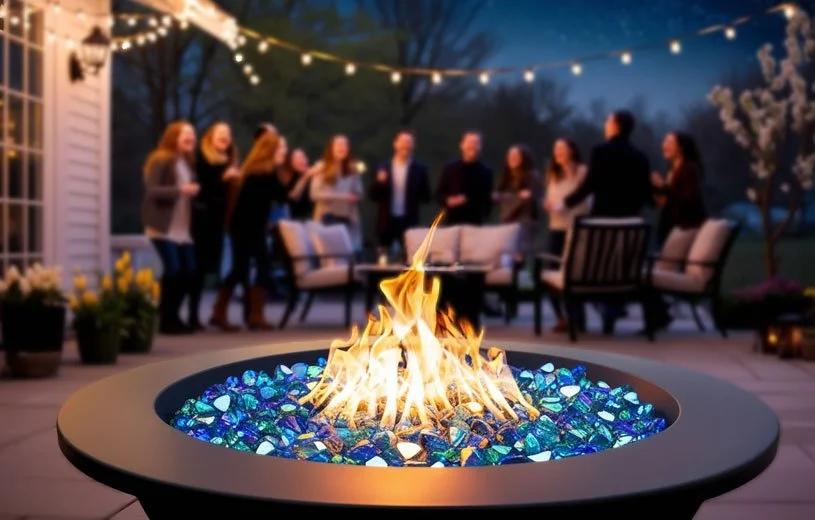
You see, a fire pit is more than a backyard accessory. It's a beacon. A conversation starter. A source of warmth and ambiance... when it’s working properly. When it’s not? Well, let’s just say one puff of smoke in the wrong direction can clear a patio faster than burnt sausages.
So I’ve made it my mission to help others avoid fire pit flops with a reliable, funny, and fabulously thorough spring maintenance routine. We’re talking beyond the usual “wipe it down and cross your fingers” approach. This guide covers it all—from gas line guts to sneaky spider hideouts, crack checks, flame colors, and that one wasp nest I will never emotionally recover from.
Let’s dive into the must-do spring maintenance ritual that keeps your fire feature looking hot—and functioning even hotter.
🌬️ 1. Gas Lines: The Veins of Your Flame (Give Them a Checkup)
Gas Lines: The Veins of Your Flame (Give Them a Checkup)
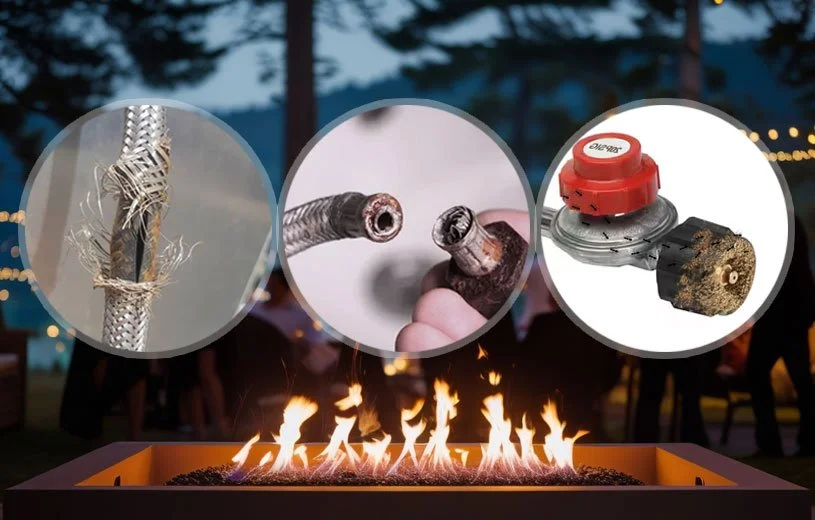
Let’s start with the lifeblood of any gas fire pit: the supply line. If the burner is your fire pit’s heart, then the gas line is definitely its circulatory system. And as someone who once spent an entire evening wondering why my pit wouldn’t light—only to discover a chewed hose—I can tell you, a quick inspection now saves a whole lot of drama later.
Here’s what I do every spring, without fail:
Visual Inspection: I crouch down (yes, even in my good jeans) and check all visible gas hoses and fittings for signs of cracking, fraying, dry rot, or chewing. Yes, chewing. Apparently, squirrels have expensive taste.
Flex Connector Check: If your fire pit has a flexible gas line (the corrugated stainless-steel kind), check for signs of corrosion at both ends. These connectors are often overlooked but can rust internally.
Regulator Vent Port: Here’s a little-known tip: the regulator has a small vent hole. If it’s clogged (say, by mud daubers or curious ants), your gas flow may be restricted or uneven. Give it a gentle tap and brush it clean with a soft toothbrush.
🫧 Bubble Test 101:
Mix a dab of dish soap with warm water, brush it over all gas line fittings, then turn the gas on for just a second (don’t ignite!). If any area starts bubbling, that’s a leak. Do not light anything. Call a certified gas tech. I don’t do DIY gas work and neither should you. This is fire, not finger painting.
💡 Nadia Tip: A drop in flame height or sudden whooshing sound? Could be a loose fitting. Never assume—it’s better to check now than explain later why your party turned into a puff of panic.
🧼 2. Rock Stars and Glass Divas: Clean Your Media Like You Mean It

Rock Stars and Glass Divas: Clean Your Media Like You Mean It
Next up, the bling. Your fire media—lava rock, ceramic stones, or tempered fire glass—is more than decorative fluff. It affects airflow, combustion, and how evenly your flames dance.
What I do for media that’s seen one too many weenie roasts:
Out it goes: I gently scoop all media out of the burner pan and lay it out on a tarp or large tray. Yes, it looks like I’m staging a photo shoot for “Backyard Minerals Monthly.”
Soak and Swish: Warm water, a drop of mild dish soap, and a few gentle swishes will lift off soot, oil, dust, and all the winter blah.
Rinse and Dry Thoroughly: Wet media in a hot burner can pop or shatter like a popcorn kernel. I let it air dry for a full day in the sun. If it’s cloudy? I wait. Or stick it in a dry laundry basket indoors.
Check for Breakage: Chipped or sharp fire glass isn’t just unsightly—it can scratch burners and mess with airflow. Out it goes. And lava rocks that are flaking or crumbling? Retire them with dignity.
🔥 Pro Insight: Some fire glass comes coated with a color enhancer that dulls over time. If your once-vibrant emerald green looks more like dusty avocado, it might be time to replace. Fresh media = fresh vibes.
🐜 3. The Bug Hotel Must Go: Burner & Pilot Assembly Inspection

The Bug Hotel Must Go: Burner & Pilot Assembly Inspection
Let’s get personal with the parts that do the lighting. The burner and pilot assembly might be small, but they’re doing the heavy lifting every time you flip that switch or strike a match.
Now, I don’t want to alarm you—but if you haven’t looked in a while, your burner assembly might have tenants.
Here’s my usual protocol:
Debris Patrol: I clear away leaves, dirt, melted marshmallow remnants (it happens), and—yes—check for insect nests. Spiders, wasps, ants, and even mice think your burner is a cozy spot. Remove them humanely if you must. But remove them.
Orifice Check: I use a small pipe cleaner to gently clean the gas orifices. Don’t use toothpicks or anything metal. You’re cleaning, not jousting.
Visual Check: Look for rust, burn marks, or cracks in the burner tubing. If something looks off, don’t “test it out.” Replace it.
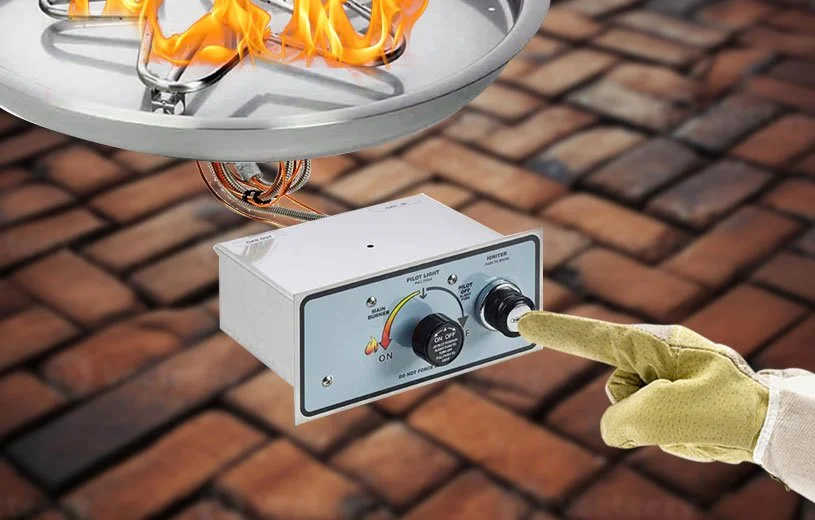
Igniter & Thermocouple Test: If you have an electronic ignition, push the button. Do you hear a click? See a spark? If not, check the battery or wiring. For match-lit models, make sure the gas comes out evenly across the burner holes.
💥 Don’t Miss This: Burner pans can warp over time from extreme heat. Run your fingers along the edge—if it’s not level anymore, it can mess with flame consistency. Some models let you gently bend them back, but replacements are safer if things are really out of whack.
🧯 4. Don’t Set the Patio Ablaze: Clear the Danger Zone

Don’t Set the Patio Ablaze: Clear the Danger Zone
You’d think this one would be obvious, but you’d be surprised how many people place their fire pit under a pergola draped in dry burlap like it’s some kind of cozy death trap. Or worse—nestled lovingly beside a wicker loveseat with cushions plump enough to roast a marshmallow on.
So, here’s my unapologetically bossy advice: clear the area.
🚫 What to move away from your fire pit:
Throw pillows (especially synthetic ones—they melt before they burn)
Umbrellas (wind and fire are a flammable couple)
Decorative mulch or dry leaves
Plastic storage bins, outdoor rugs, tiki torches (I see you…)
That adorable wooden bench that your dog uses as a lookout tower
🧽 What to do instead:
Sweep the patio or stone base completely clear
Rinse off any soot stains or grease that may have splattered during last season’s s’morespalooza
Check that the ventilation openings underneath the pit are clear of cobwebs, pine needles, or—you guessed it—more bug nests
💡Nadia Tip: If your fire pit is on a wood deck, always use a heat barrier mat underneath. I once saw a scorched plank shaped like Florida, and now I can’t unsee it.
⚡ 5. Power Play: Batteries, Breakers & Button Testing
Power Play: Batteries, Breakers & Button Testing
If your fire feature has any kind of electronic ignition, it’s not just about flipping a switch and calling it a day. You need to prep your pit like you would a picky toddler with a juice box and one sock on backward—it takes finesse, patience, and maybe a few whispered threats.
🔋 Start with the power source:
Battery-operated systems: Open the ignition module and replace the battery—even if it worked last year. Batteries are like leftovers: just because they’re there doesn’t mean they’re good.
Check for corrosion: If the terminals look crusty or green, clean them gently with a cotton swab and vinegar.
Plug-in models: Make sure the outlet is working. Flip your GFI if needed, and ensure no wires are pinched, melted, or—gasp—chewed. (Nova once took a suspicious interest in the cord. We had a chat.)
⚙️ Next, test the components:
Press the igniter. Do you hear a spark?
If it’s a glow-style igniter, you should see a reddish glow through the pilot hood
Still nothing? Check your user manual or do what I do—call your favorite gas tech and sweet-talk them into a service call before busy season hits
🔖 Pro Tip: Label the fire pit breaker at your electric panel. It’ll save you the awkward game of “Which breaker is it?” while your guests wait around wondering if this is a team-building exercise.
🔎 6. That Flame Doesn’t Look Right: Test Fire & Check Color

That Flame Doesn’t Look Right: Test Fire & Check Color
Let’s say you’ve reassembled everything, turned the gas back on, and your fire pit roars to life with dramatic flair. Bravo! But… take a moment. Observe. Because flame color and behavior say a lot about your fire pit’s health.
🔥 A good flame should be:
Mostly blue at the base, with soft golden-yellow tips
Steady, not flickering wildly or pulling in one direction
Quiet—not making a loud whooshing or roaring noise
🚩 Warning signs to look for:
Orange or dark yellow flames throughout: This can indicate poor air-to-gas ratio or dirty burner ports
Black soot on your media or patio: Your fire pit might be burning inefficiently, especially if ventilation is blocked
Lazy, droopy flames: Often a sign of low gas pressure or a clogged burner
🧯 What to do if something’s off:
Double-check that all your air intakes and vents are clean and open
Make sure your gas line is fully open—not halfway like last spring when I swore it was fine until I realized Nova had bumped the valve mid-zoomie
If you’re still getting poor performance, have your gas pressure tested by a pro—it might be a regulator issue or a clogged orifice
💡 Little-Known Fact: Wind can affect flame shape and burner performance, especially with linear fire pits. If your flames are constantly leaning, consider a wind guard. They’re like windshield wipers for ambiance.
🔩 7. Is It Wobbly or Whiny? Tighten Up the Hardware
Is It Wobbly or Whiny? Tighten Up the Hardware
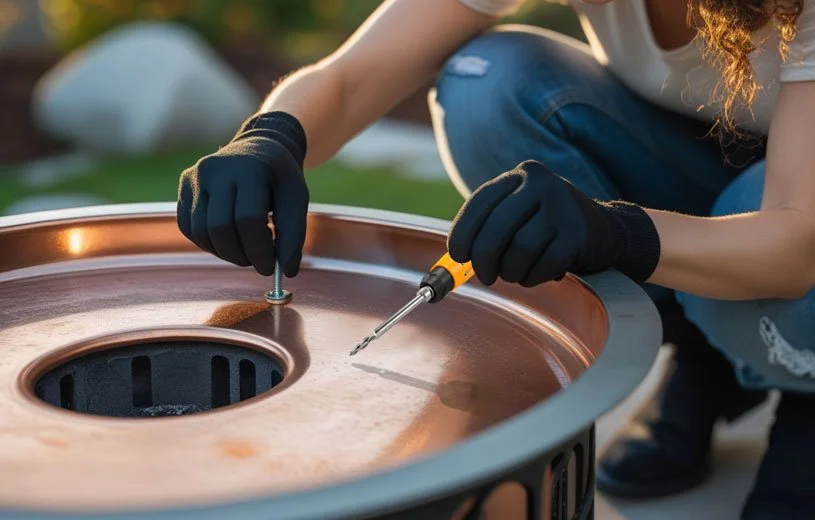
Now, I love a good rustic aesthetic as much as the next person—but when your burner pan starts to rattle like an old shopping cart, it’s time to grab a screwdriver and do some tightening.
Loose parts don’t just make noise—they can be dangerous. Burner rings shift, connections wiggle, and suddenly you’ve got uneven flame spread or a burner tilted like it’s judging you.
🛠️ Things I always check:
Burner mounting screws – They can loosen from thermal expansion over time
Fasteners on the burner pan or media tray – Especially if your pit was moved or bumped during winter
Control panel nuts and switches – I once had a switch pop loose and fall inside the enclosure mid-party. Not a crowd-pleaser.
Igniter module brackets – Vibration can shake them just enough to cause misfires
💡Nadia’s Bonus Tip: If you hear any rattling, humming, or metallic pinging during operation, pause. Turn off the gas. Investigate. It’s usually a hardware gremlin trying to ruin your evening.
🧾 8. Time to Fire It Up: Your Personalized Spring Startup Script
Time to Fire It Up: Your Personalized Spring Startup Script
Alright, it’s time to strut your stuff. You’ve cleaned, inspected, tightened, tested, and likely fended off at least one spider. You’re now the proud owner of a refreshed, safe, fabulous fire feature.
Here’s your no-fail spring fire pit startup checklist:
✔️ Gas lines inspected (no cracks, leaks, or creepy crawlers)
✔️ Fire media cleaned, dried, and safely reinstalled
✔️ Burner and pilot assembly inspected, cleared, and tested
✔️ Surrounding area cleaned and cleared of flammables
✔️ Electrical components tested (batteries, GFI, igniter module)
✔️ Flame tested for color, height, and noise
✔️ All fasteners tightened, panels secured, no wobble or tilt
✔️ Burner pan level and stable
✔️ Flame guards or wind shields in place (if applicable)
✔️ You, standing there with a confident smile and maybe a s’mores stick
Print it. Tape it inside your storage bin. Tattoo it on your arm. (Okay, maybe not that last one.)
🌟 9. Fire Pit Faux Pas: The Most Common Mistakes I’ve Seen (and Laughed At Later)
Fire Pit Faux Pas: The Most Common Mistakes I’ve Seen (and Laughed At Later)
Look, we’ve all made questionable fire pit choices. I once toasted marshmallows using a metal skewer that I forgot to remove the price tag from. Let’s just say it didn’t taste like cinnamon.
Here are some real-life don’ts I’ve witnessed:
🔥 Someone using tiki torch oil in a fire pit (It exploded. No joke.)
🧼 Cleaning lava rock with bleach and then lighting the pit 20 minutes later (Poof.)
🧃 Kids tossing juice boxes into the flames “for fun”
🧻 Someone storing paper towels in the access panel because “it seemed dry”
🪑 A metal chair leg melted right into the side of a fire pit. They called it modern art. I called it... a hot mess.
💡Moral of the story: Just because it fits in the fire pit doesn’t mean it belongs there.
🧠 10. The Mindset Shift: From Maintenance to Fire Feature Mindfulness
Let’s take a moment here—not just to reflect on your now-glorious fire pit, but on why we even do this in the first place.
Spring cleaning isn’t just about keeping things from falling apart. It’s about respect. Respect for the space you gather in. Respect for your own safety. Respect for the fact that fire, as beautiful as it is, demands a little humility.
When I light my fire pit on that first spring night, I feel like I’m inviting warmth, joy, and a little magic into my backyard. And that feeling? It’s worth every dusted vent, every tightened screw, every awkward crawl on the patio pavers.
🔥 So let this be your sign: take care of your flame, and it’ll take care of you.
Nadia’s Last Spark: Queen of the Flame Signs Off

Nadia’s Last Spark: Queen of the Flame Signs Off
If you’ve followed this guide step-by-step, your fire pit is now cleaner, safer, and happier than a dog who just found the snack drawer open.
Whether you’re planning late-night chats under the stars, peaceful solo evenings with a good book, or s’mores with a side of chaos (hello, neighborhood kids)—you can now do it all with peace of mind.
As for me? I’ll be outside, wine in hand, Nova at my feet, admiring the soft glow of a flame that’s flickering just right.
And if you ever catch your fire pit acting up again mid-season? You know where to find me. Probably under it with a flashlight. Or posting about it, covered in soot.
By Nadia, flame enthusiast, seasonal soot whisperer, and reluctant spider relocator